
How is 3D graphics made?
How are 3D graphics created?
If you’ve ever wondered what the process of creating 3D graphics looks like, how animations are made, and what allows us to create visualizations that distinguish products from the competition, below we describe the basic stages of such projects.
I hope this will allow us to jointly prepare effective graphic creations to promote your products.
At the beginning of cooperation, the most important stage is to collect information and determine to what extent we can help, i.e. what are your expectations for the presentation, whether we create sales visualization for websites, services such as Amazon, or advertising animation or instructional video.
Table of contents:
Creation
The briefing and information-gathering process is very important. The more initial information we get from you, the better 😉 As a team of animators and graphic designers, we try our best to understand the specifics of the product.
Depending on whether we are creating an advertising, instructional, or educational visualization, we propose different forms and graphic solutions.
Below are two examples – a short advertising form and an instructional animation showing the process and operation of the equipment.
Knowing the fields of use of our creation, we can propose appropriate dynamics and characters of animation. Based on information and examples collected together, we try to propose appropriate graphic or animation solutions.
What is helpful for 3D creations to efficiently prepare a project?
- description of the subject, determining the nature of the graphics or animation
- fields of exploitation, where the project will be published?
- brief, scenario or storyboard showing your expectations and the nature of the project
- examples of similar productions or reference materials – links to online examples
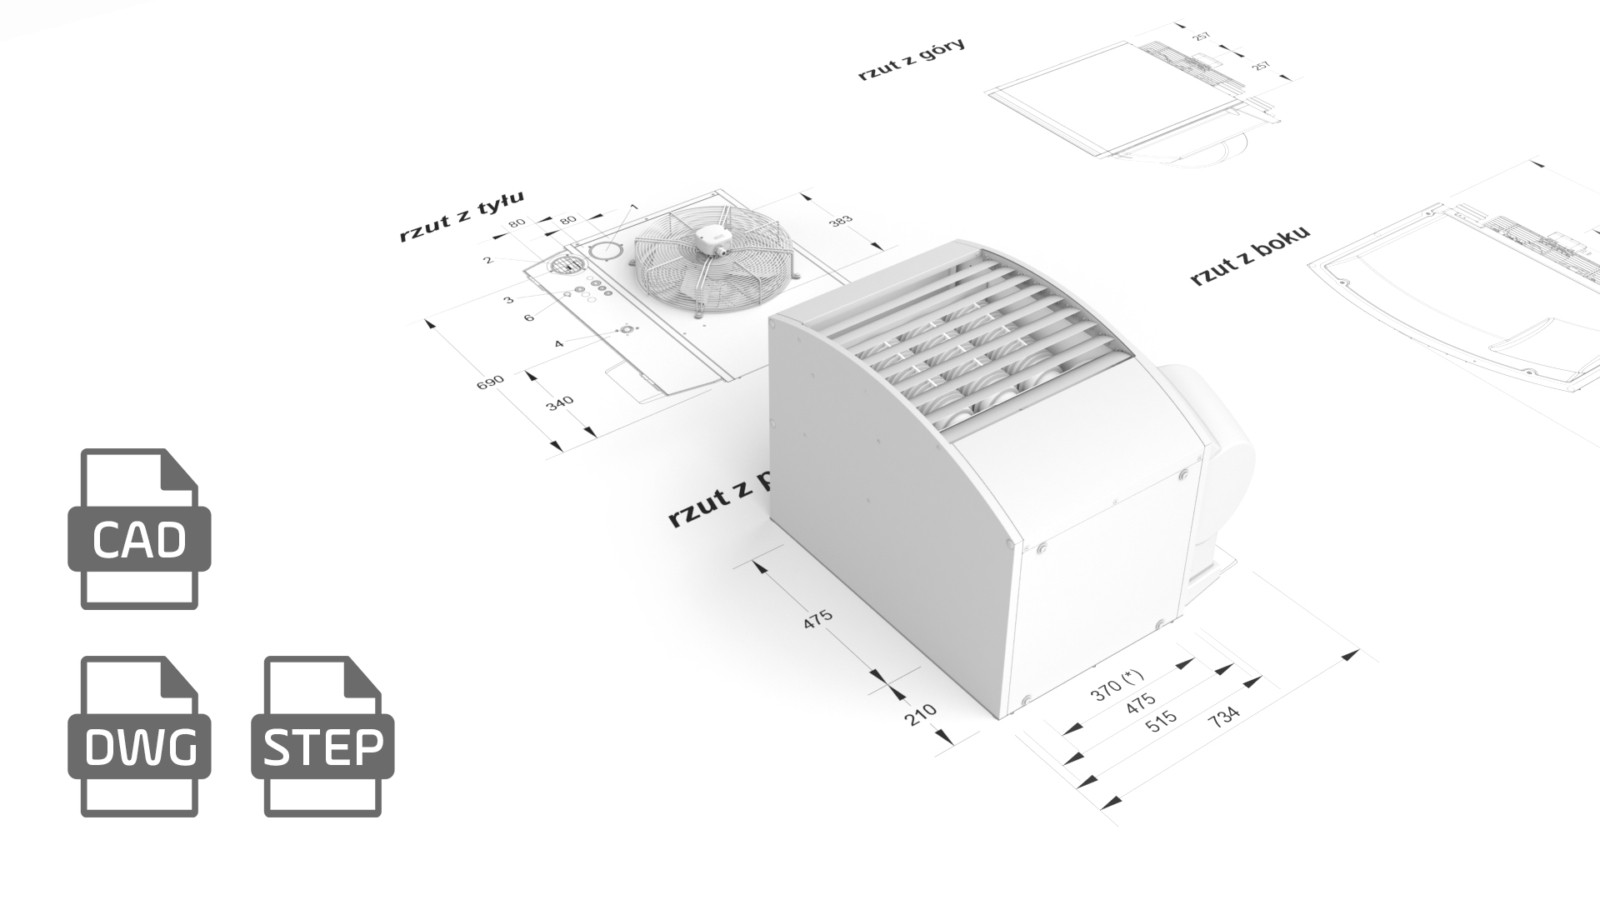
- photos or technical drawings of products – to evaluate the complexity of 3D models
- engineering CAD files – such materials are super helpful for graphic designers and speed up the process of creating solids and the correct appearance of visualized products
- labels, 2D graphics, photos, and inscriptions appearing on products, branding materials – helpful for preparing textures
- brand book, style guidelines, logos, and identification materials
A 3D graphic designer can create any model based on photos, technical drawings, or even according to a sketch and basic dimensions. For furniture visualizations, sketches or photos are usually enough. For the creation of equipment, machinery, or complex technological systems, we must support ourselves with engineering documentation in CAD files.
This can accelerate the process of creating complex shapes in 3D and allows us to show them in visualization.
There are 3 main steps of 3D production proces:
Pre-production
- collecting available materials and determine the type of creation
- checking available documentation and files to prepare 3D models of products and accessories
- we develop a creative proposal for the presentation of the product or process
- we develop a framework scenario for consultation
- in the case of more complex animations, it is good to prepare a storyboard and then on its basis animatic
- we collect helpful materials: graphics for branding, graphics for textures, written content to be placed in the film, infographics, and data to plan the timing and dynamics of scenes
- we establish a proposal for sound design and written content
Production
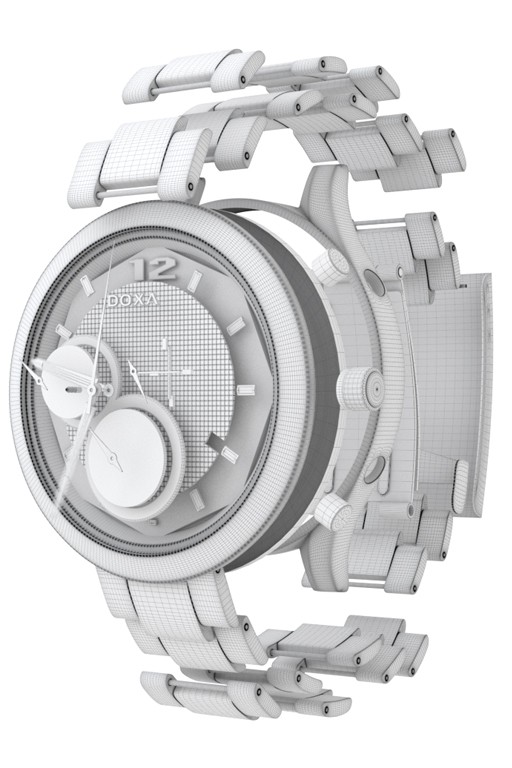
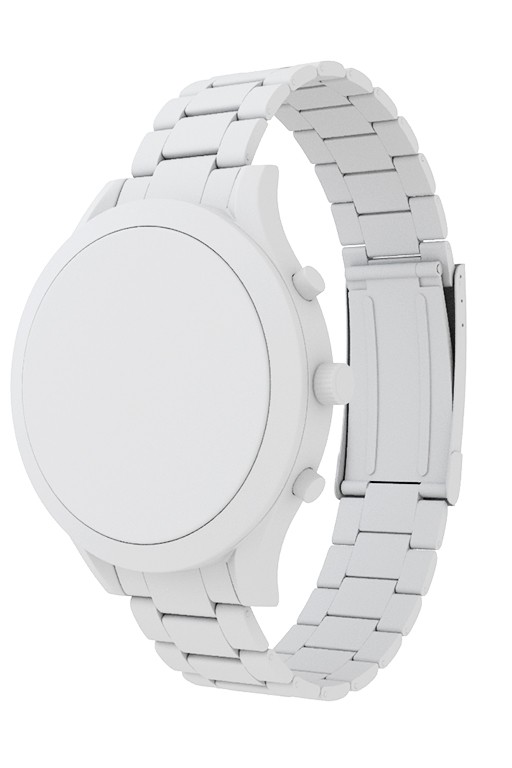
At this stage according to the collected available initial materials we create 3D solids of objects for visualization. Graphic designers reproduce every shape and detail planned in the brief. After the 3D models are made, the appearance of the surfaces and materials of the product is developed – the so-called texturing and mapping of 2D graphics.
Once all the 3d models are ready We can think and plan the scenery for the presentation.Its crucial to determine what kind of scenery would be better for planned presentation, Is it going to be neutral background or complex interior or exterior scene.
We offer both visualizations on a neutral background in catalog shots or any other arrangement. From packshot views through product renderings in various layouts to individual interior arrangements showing the context and location of the presented products. In 3D graphics, we have full control and possibilities of any change of lighting – from studio to day or night.
One of the last stages in the production of 3D graphics is setting up the lighting. Here we have an advantage over traditional photography and can fully control the light, including the movement of the sun 😉.

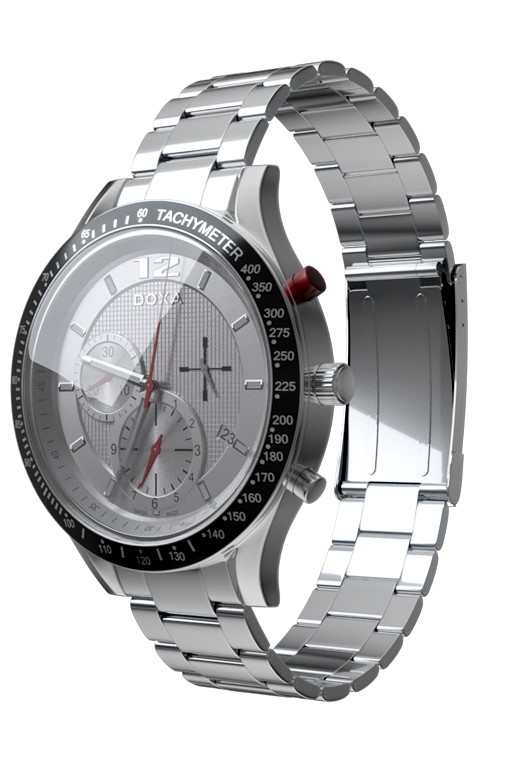
3D models set up in appropriate planned shots, lit so that the products look perfect are shown in test visualisations for approval. This is a good time for changes and final fine-tuning of details.
In the case of animation, at this stage, we prepare the movement of objects and virtual cameras according to the previously planned scenario or storyboard. An animatic is created showing schematically the plan of shots and frames of the animation. This allows us to plan additional content and infographics that can be shown in the established scenes.
The next stage of preparation is rendering. This is usually a time-consuming process, after which any change requires re-rendering the animation frames or generating the visuals again. That’s why it’s important to approve sample visualizations or animatics in advance.
Rendering and post-production
Rendering is the process of computers converting 3D graphics according to pre-planned settings for the appearance and lighting of each scene. The rendering time of the visualization depends on the type of objects presented, and significantly on the resolution of the generated images. The higher the resolution, and more complex scenery, the longer we have to wait for a good-quality final result. Rendering graphics for large-format printing for posters or trade show booth walls can take several hours of computer work, but we get graphics with resolutions greater than 10000 pixels, i.e. 5x greater than HD.
For animation, each frame of the video is rendered separately. The finished frames make up a smooth video sequence. Low-resolution visualizations render quickly but images for large-format printing or 4K animation often require great computer processing power. Therefore, for high-quality animations or renders for large-format printing, we use an online render farm with access to the computing power of more than 2,000 processors. This reduces the waiting time for the final result of animation rendering from a few days to a few hours.
The final stage of work is the editing of video sequences or visualization layers and post-production.
We add color and effects post-production, planned infographics, or written content.
We assemble finished visualization images into final publication formats, from flyers to brochures, online publications, or large-format prints. Compressing the animations into the video formats of your choice, adding sound and voiceover…
And we got it! For a condensed overview of the whole process (with rough timelines) see also our “how a 3D animation is made” guide on modelight.pl/3d.
Frequently Asked Questions
Ready to start your project?
Send us a brief, photos, or a CAD file — we’ll prepare a free quote.
See our portfolio